Growing marijuana can be easy, if you know what you are doing.
Before I get into this easy minimal step guide to grow marijuana, let me remind you that I created this guide with the intention to write it from a normal person’s perspective. I keep it simple and try to avoid use of scientific terms that over complicate things.
So let me remind you, weed grows like a weed.
Why does that matter?
Weeds are those pesky things in your lawn that you CAN’T get rid of. They are hard to kill and resilient. For the most part Marijuana is the same. It’s most delicate state is when it first sprouts and essentially until it gets to its second tier of leaves. Then it becomes hardier and hardier.
Does this mean you should not baby your marijuana plant? NO!

The better you treat your plant the better it will reward you with buds to smoke. Now if you have read my other posts, you know the difference between autoflower and photoperiod. If you decided to get clones instead of starting from seed skip ahead to the step about potting your plant.
Lastly, I am assuming you read my Easy Grow Guide item list post, but if not you can read it by clicking HERE. The reason I mention the item list is because I am going to assume you have everything that I have.
Here we go
Sprouting Marijuana Seeds
The first step is find a water bottle that is disposable. Fill it up with tap water.
Find hydrogen peroxide. Yes, the stuff you put on cuts and find at your health store. This should be the diluted kind. You will likely see 3% somewhere on the bottle. If you don’t have any hydrogen peroxide you can buy some here: Hydrogen Peroxide 3%

Put a splash of the hydrogen peroxide into the water bottle filled with tap water. If you are nervous about putting in too much put in a teaspoon or two.

Next, find some paper towels, and with the mixed water and hydrogen peroxide, soak the paper towel.

Ring the paper towel out leaving just a little extra moisture
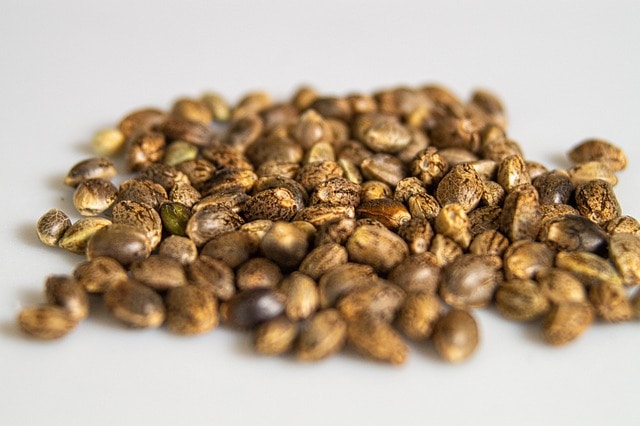
Take your seeds
(for this guide make sure you get autoflower seeds)
and put them between the paper towel

(fold it into quarters and then put the seeds in the middle)
Put a small splash of the hydrogen peroxide on the top of the paper towel where you see the seeds are.

Next, find a plastic baggy that you can zip close and will fit the paper towel
Place the paper towel in between and seal the bag almost completely leaving just a crack open. We do this to create a mini grow room or green house. This will also increase the germination rate of your seeds.

Germination means the time it takes from looking like a seed to having a route and looking like a sprout
Put the baggy with the seeds and place them in a dark spot for 24-48 hours.

Prep For Your Marijuana Sprout To Be Planted
Might take a little longer if your seeds have different genes (types) or are older because more time that pasts lowers the chance they sprout or germinate

In between this time range your seeds will sprout. Yes, that fast. We now need to plant the seed, so you take your Jiffy Pellet,
and having followed the directions,

soak the pellet until it is the height of your thumb. If you added too much water, gently squeeze it to get the excess water out,

but not to rip the material holding the peat.
When the root that is coming out of the seed equals the size of the seed itself, then find a set of tweezers.
Being EXTRA CAREFUL
as the Marijuana plant is extremely fragile in this state,
using the tweezers pick the seeds up being careful not to put too much pressure on the shell so you don’t break the root or crack the shell. Place the seed root side down into a pellet.

Gently using the tweezers cover the top of the seed with the peat. This should just cover the top of the seed. DO NOT PUT IT TOO DEEP!

Spray the top of the plastic dome with a spray bottle filled with tap water or distilled water or if you have good water tap will do. This will create a little moisture.

Again, we are creating a green house. In a plants early life it needs lots of moisture but not so much you drown it.
Be patient with your marijuana plant
The best part of these pellets and how quickly weed grows is you can almost watch it grow. Place the seed starter tray somewhere WARM and in the sun or under a light.

(Don’t be an idiot and put it too close to a light that you melt it)
Temperature should be around 60-80°F or 17-24°C
In a few days, 3-5 usually but can be a bit longer depending on strain, the plant will pop up and begin to rapidly grow. As you get to day 5 you may need to mist the pellets to make sure they don’t dry out.
Remember mist them to keep them damp but not soaking wet. The pellet should be no wetter than when they first expanded.
When the sprout is the size of the Jiffy Pellet it is time to repot the plant.
Potting your marijuana plant
Before the Marijuana baby plants hit the top of the plastic dome you can uncover them for a day or two.
Take one of your fabric pots and fill it almost full of the Stonington dirt. Around 2-3 inches from the top of the bag.
Make a small hole and place your pellet inside the dirt. One pellet per pot!
Cover the pellet slightly with more dirt and lightly press the dirt. Don’t push crazy hard just firm enough that if you tapped it the dirt wouldn’t be loose

Careful not to cause a tsunami…. but water the pot. Remember they are fabric pots so water will run out the sides and bottom.
- You will want to slowly keep adding water,
- let it soak in,
- add some more until it begins to run out the bottom.
- Once it runs out the bottom, place the pot under your grow light and into your grow tent

Next stop buds
Now in later posts I will talk about:
- training techniques,
- pruning and
- all that other stuff.
However, for this easy guide you are in the final stretch. Monitor the plant but don’t watch it because when you do that you do dumb stuff and will kill the plant.

Check once a day to make sure the plant is damp not wet. If you were to put your finger in the soil up to your first knuckle. The soil the bottom of your finger hits should not be wet. It should feel like soil you sprayed with a mister just one time.
If the plant is drooping it is usually a sign of over or under watering so watch out for that.
The good news is the fabric pots are meant to breath and the Stonington soil is meant to drain, so if you ever over water simply stop watering and it will dry out in the next few days.
For one of those fabric pots I start usually by watering with a ¼ gallon a day. If it builds up that I notice it looks like I just watered I skip a day.
The downside to the pots is usually you can’t go more than 3-4 days without watering because the soil will be noticeably dry. This will cause your plant to wilt very rapidly.
I will be writing an article under: basic info, about ways to water when you have to leave for a weekend or maybe want to try and schedule the watering as much as possible. Make sure to keep an eye out there for useful tips and tricks.
Your lights should be running 20-24 hours a day.
Some will argue constant light, some will say 20-4, and some will say 18-6. The answer is they all work and there is probably an even mix between a little snooze for your plant and light to grow.
Subsequently, I always assumed plants are like us that they heal when they sleep, so I shoot the middle with my autos and do 20 hours of lights on and 4 hours of darkness.
I highly recommend using this surge protector/ timer:

Then as the plant gets to about a foot tall you will notice you need to put about a half a gallon a plant/ pot. The Marijuana has those big weed leaves that you see in pictures the step is a lot thicker and your plant is starting to bush out.
Make sure to raise your lights to keep it about 18” above the plant.
This is a simplistic guide and if this is your first grow or two,
I highly advise against anything you heard about regarding topping your plant, defoliating, or low stress training.

Keep it simple
Don’t risk killing your plants until you figure out what you are doing and get the hang of it. The reason I say this is,
every time you stress your plant the higher the chance you will get less buds.
This is because you effect its ability to grow when you stress it out or have close calls.
Weed buds start to show
You have made it to the two-month mark. It is around this time you will notice buds starting to form. If you see anything that looks like a pair of bananas or balls this is a TERRIBLE SIGN.
Panic immediately.
This is only possible if you have a male plant.
One male can and will litter all your female plants with seeds and make the buds less desirable.
Throw this plant out. If you got a female it was a lie or you stressed it out so much it turned into a hermaphrodite. A plant can turn itself into a male and a female if you stress it out enough.
You can try cutting this area off if the rest of the plant looks like a female. However, it is recommended to toss the plant altogether.
What will happen 99% of the time, if you follow the steps I have laid out so far, is your flowers will start to fill out and your plant will continue to grow.
You are in the final stages.

Continue to water and if for any reason you decided to add fertilizer stop.
You don’t want to have that flavor in your buds.
If you use the Stonington soil as I suggested it has everything the plant needs for nutrients for the complete grow so it is as simple as water.
At this point the plants have grown a lot.
Should for any reason the plant grow above the lights make sure to prune them around it a bit. The lights do get warm/hot and you don’t want to risk anything going up in fire.
Think of playground with a magnifying glass and the leaf when you were kid and how you could light a fire….. yep much the same idea here.
The lights are focused to try and replicate the strength of the sun.

As the plant buds mature it will start giving signs when it is time to cut the plant down.
- The leaves will start to discolor,
- purples might come out in the leaves,
- some will brown,
- and the buds have filled out.
- The little white hairs are mostly browned on the buds.
This is the sign it is ready to harvest.
You can also take a picture while it is zoomed in. Looking at the picture you will see something like the picture below.
The little sticky looking droplets start clear and as they mature they turn white and then finally brown. You want them at LEAST all white with a few brown.
The more brown sticky droplets you see the more mellow the high will be and THC effects reduce.
The more white you see the more of a strong effect you feel. Most shops you see have about 20-30% of the trichomes lightly brown.
When the buds look good it is time to cut the plant down at the base. Take a string and tie it around the base of the plant you cut off.
Harvest
Take the other end of the string and tie it to the top of your tent with your plant hanging upside down.
Turn the lights off but keep your exhaust fan with the carbon filter going.
This not only creates airflow, but it also significantly reduces the smell of weed in your
- room,
- house,
- the yard as the plant stinks to high hell and has since it started flowering.
Keep the tent dark, the exhaust going and if you live in a humid location put a fan not blowing on the plant, but moving the air in the bottom of the tent.
The humidity should be around 40%.
If you need to use a dehumidifier or the opposite make sure to use it in the space around, but not directly in so you don’t affect the plant. You would hate to go all this way and cause mold on the plants as they dry.

This last and final stage is the most critical to getting good bud.
You want to put your buds into storage whether your next stage is curing, placing in a sealed back, or whatever storage device you have,
you want to do this when your plants is around 62-70% humidity in the plant itself not the air around it.
A bud dries from the outside in, so drying too quick or placing into storage before it is at optimal range can lead to mold, dry crunchy bud or just not that great of flavor.
The general trick is it is time to store when you take one of your middle branches and the branch almost snaps, but not completely when you bend it. Snapping means it is already dry so your curing window has just been reduced.

That is it you have successfully gone through a complete grow cycle.
Make sure to keep an eye out for my article coming soon on how to cure your Marijuana in my basic info section. I said it earlier the reason my bud’s taste and smell so good is the curing process. I promise once you try it you won’t want to go back to doing anything else.
Now fire up your Pax and read my article about my favorite ways to consume the weed you just grew!


